Part 1, A test surface
The first step is to
create a test surface. The surface should not be too complicated, but should be
sufficient to exercise a design thoroughly. A quick surface is made from a blended
sweep with profiles placed on parallel vertical work planes.

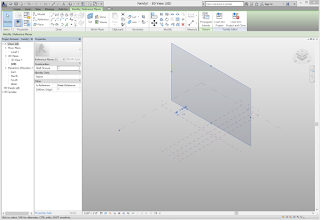
Use Revit.New.Conceptual Mass to open a new family.
Controlling the location of points in 3D space is best done by creating reference planes for hosting elements. Viewing the 3D View, hold down the CTRL key and drag one of the vertical planes to make a copy vertical plane. The dashed blue line will appear when the copy is aligned with the original plane.Make two more vertical planes, for a total of four planes. Draw one vertical plane in the other direction.
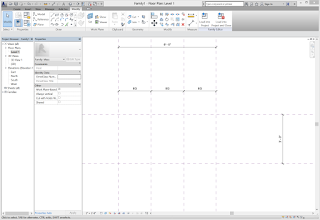 In plan view, it is easy to add dimensions to the reference
planes. I added a continuous dimension to the four parallel ones and set them
to be Equal. I added another dimension to set the set of reference planes to be
a total of 6 feet, and a dimension to set the other one to be 3 feet.
In plan view, it is easy to add dimensions to the reference
planes. I added a continuous dimension to the four parallel ones and set them
to be Equal. I added another dimension to set the set of reference planes to be
a total of 6 feet, and a dimension to set the other one to be 3 feet.
It can be helpful to change the scale and zoom in close.
In plan view, draw four points on each vertical plane.

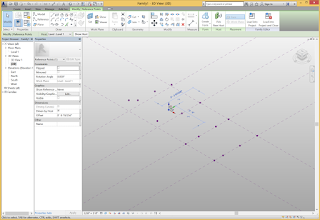
Switch to 3D view. Play with the points by dragging them vertically. The blue arrow that appears when a point is selected constrains movement to be vertical.
Viewing in 3D can be challenging. A powerful tool is the View Wheel and its Center option. This sets the center point for the Orbit tool. It may also be helpful to set an appropriate scale.
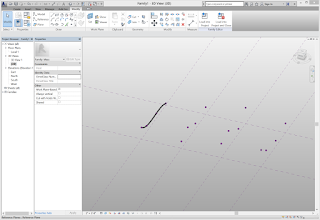
Select four points on one vertical plane. This can be done by clicking each point while holding down the CTRL key, or window selecting the four points. Pick the Spline through points tool to create a spline curve through the four points. Repeat for the other sets of four points.
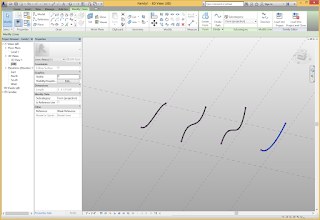
Select the four spline curves. Pick the Create form tool to make a surface. You can drag the points up and down to make the surface more interesting.
Save this file so it can be used in subsequent steps.


Use Revit.New.Conceptual Mass to open a new family.
Controlling the location of points in 3D space is best done by creating reference planes for hosting elements. Viewing the 3D View, hold down the CTRL key and drag one of the vertical planes to make a copy vertical plane. The dashed blue line will appear when the copy is aligned with the original plane.Make two more vertical planes, for a total of four planes. Draw one vertical plane in the other direction.
 In plan view, it is easy to add dimensions to the reference
planes. I added a continuous dimension to the four parallel ones and set them
to be Equal. I added another dimension to set the set of reference planes to be
a total of 6 feet, and a dimension to set the other one to be 3 feet.
In plan view, it is easy to add dimensions to the reference
planes. I added a continuous dimension to the four parallel ones and set them
to be Equal. I added another dimension to set the set of reference planes to be
a total of 6 feet, and a dimension to set the other one to be 3 feet. It can be helpful to change the scale and zoom in close.
In plan view, draw four points on each vertical plane.


Switch to 3D view. Play with the points by dragging them vertically. The blue arrow that appears when a point is selected constrains movement to be vertical.
Viewing in 3D can be challenging. A powerful tool is the View Wheel and its Center option. This sets the center point for the Orbit tool. It may also be helpful to set an appropriate scale.

Select four points on one vertical plane. This can be done by clicking each point while holding down the CTRL key, or window selecting the four points. Pick the Spline through points tool to create a spline curve through the four points. Repeat for the other sets of four points.

Select the four spline curves. Pick the Create form tool to make a surface. You can drag the points up and down to make the surface more interesting.
Save this file so it can be used in subsequent steps.

No comments:
Post a Comment